Getting started

Set up BrandMyFood for your restaurant.

A guided path to launch BrandMyFood — menu, POS, kitchen display, website and ordering. These steps are recommended. The product does not complete them for you.

01Getting started

Install the right app on each PC, then sign in.

After signup, the login email and temporary password are sent to the inbox. Use those credentials in the desktop app. BrandMyFood does not complete the restaurant setup for you.

Which app on which PC?Windows
  1. Manager (office)
  2. POS and Tables
  3. Kitchen Display
  4. Kiosk
  5. Customer Display
  • Office / admin → BrandMyFood Manager
  • Counter / waiter → POS and Tables
  • Kitchen → Kitchen Display
  • Self-order → Kiosk
  • Customer TV → Customer Display
  1. Install Manager on the office PC and sign in.
  2. Build the menu in Menu Manager: categories, products and prices.
  3. Install a station app on each other PC and set printers on that PC under Hardware → Print settings.
  4. Set open hours, and delivery area, in Settings.
  5. Edit the website homepage in Site Editor.
  6. Place a test online order and confirm it in Online Orders and Kitchen.

Install one package per PC. Printer settings stay on that computer. macOS is not available yet. Windows installers are on the download page. The phone view for staff does not replace the till.

Where do I download the apps?

Use the station links in this section. Each installer opens only that station.

How do I sign in the first time?

Open the app, enter the email and temporary password from the signup email, then create staff accounts for each station.

03POS

The till takes the order and the payment.

POS handles dine-in, takeaway and delivery orders, then payment and the receipt. Sample service here is Table 08, order #142, £29.50.

OrdersSearch

  • Dine-in, takeaway and delivery
  • Split bills
  • Modifiers
  • Cash, a configured card terminal, Stripe QR, or Teya POSLink where configured
  1. On the counter PC, open POS and Tables.
  2. Open the table or a counter order.
  3. Add products and modifiers.
  4. Take payment with a method that is configured on this station.
  5. The receipt prints from this PC’s Hardware → Print settings.

A card terminal is not on every setup. Receipt and kitchen printers are configured on the PC that prints. Send the order to the kitchen from the till.

How do I take payment?

Open payment, choose cash, the configured card terminal, Stripe QR, or Teya POSLink where that terminal is configured, then confirm.

Can a bill be split?

Yes. A table bill can be split into separate payments.

What if the internet drops?

Core till work can stay on the local network with the kitchen. Cloud orders still need a connection.

04Tables

Floor state and the open order stay together.

The floor shows available, occupied and reserved tables. Selecting a table opens its order. A reservation does not create the POS order.

Floor planList view

Lunch

  • Available, occupied and reserved
  • Table order
  • Reservations stay separate from the open bill
  • Layout for the dining room
  1. Open Tables.
  2. Select a table.
  3. Take or review the order.
  4. Update the state when the table turns.
  5. Keep reservations in Reservations; they do not open order #142 by themselves.

Table 08 in the sample floor is occupied with order #142. Table 01 is available. Reserved is a floor state, not a paid order.

How do I attach an order to a table?

Select the table, then add products on the till.

Does a reservation create a bill?

No. The POS order starts when the table is served.

05Kitchen

The same order appears on the kitchen queue.

Kitchen Display is its own station. Tickets arrive from the till, tables, the restaurant website and configured delivery channels.

  • Received, preparing, ready, served
  • Source on the ticket
  • Elapsed time
  • Kitchen printing where configured
  1. Install Kitchen Display on the kitchen PC.
  2. Watch tickets arrive.
  3. Move a ticket as it is prepared.
  4. Mark it ready for service.
  5. Confirm a test ticket from both the till and a website order.

Cloud orders need internet. Till-to-kitchen can use the local network. A kitchen printer can run beside the screen. Do not treat the kitchen PC as the manager PC.

Do till orders appear on their own?

Connected POS and table orders enter the kitchen queue.

Do website orders appear too?

Yes, with their source. External providers still depend on setup, and Just Eat on approval.

06Online orders

Website orders and configured channels land in one inbox.

Direct website orders are the restaurant’s own channel. BrandMyFood charges 0% commission on those orders. Payment processing and other provider fees may still apply.

  • Website, click and collect, delivery zones
  • Uber Eats — setup required
  • Deliveroo — setup required
  • Just Eat — approval-dependent
  • WooCommerce — credentials and polling
  1. Open Online Orders.
  2. Filter by source.
  3. Accept the order your operation will make.
  4. Send it to the kitchen queue.
  5. Follow delivery status where the restaurant delivers.

A delivery map is available where delivery operations are configured. Do not describe every provider as already connected. Just Eat stays approval-dependent.

Is there a BrandMyFood commission on a website order?

No. 0% is for direct orders only. Processors and other providers may still charge.

How do external channels connect?

Each provider is connected during setup. Just Eat also needs provider approval.

07Website

Edit the restaurant site, then check it live.

Site Editor updates homepage content, featured products, hours, contact details and the theme. A custom domain can be connected when the restaurant has one.
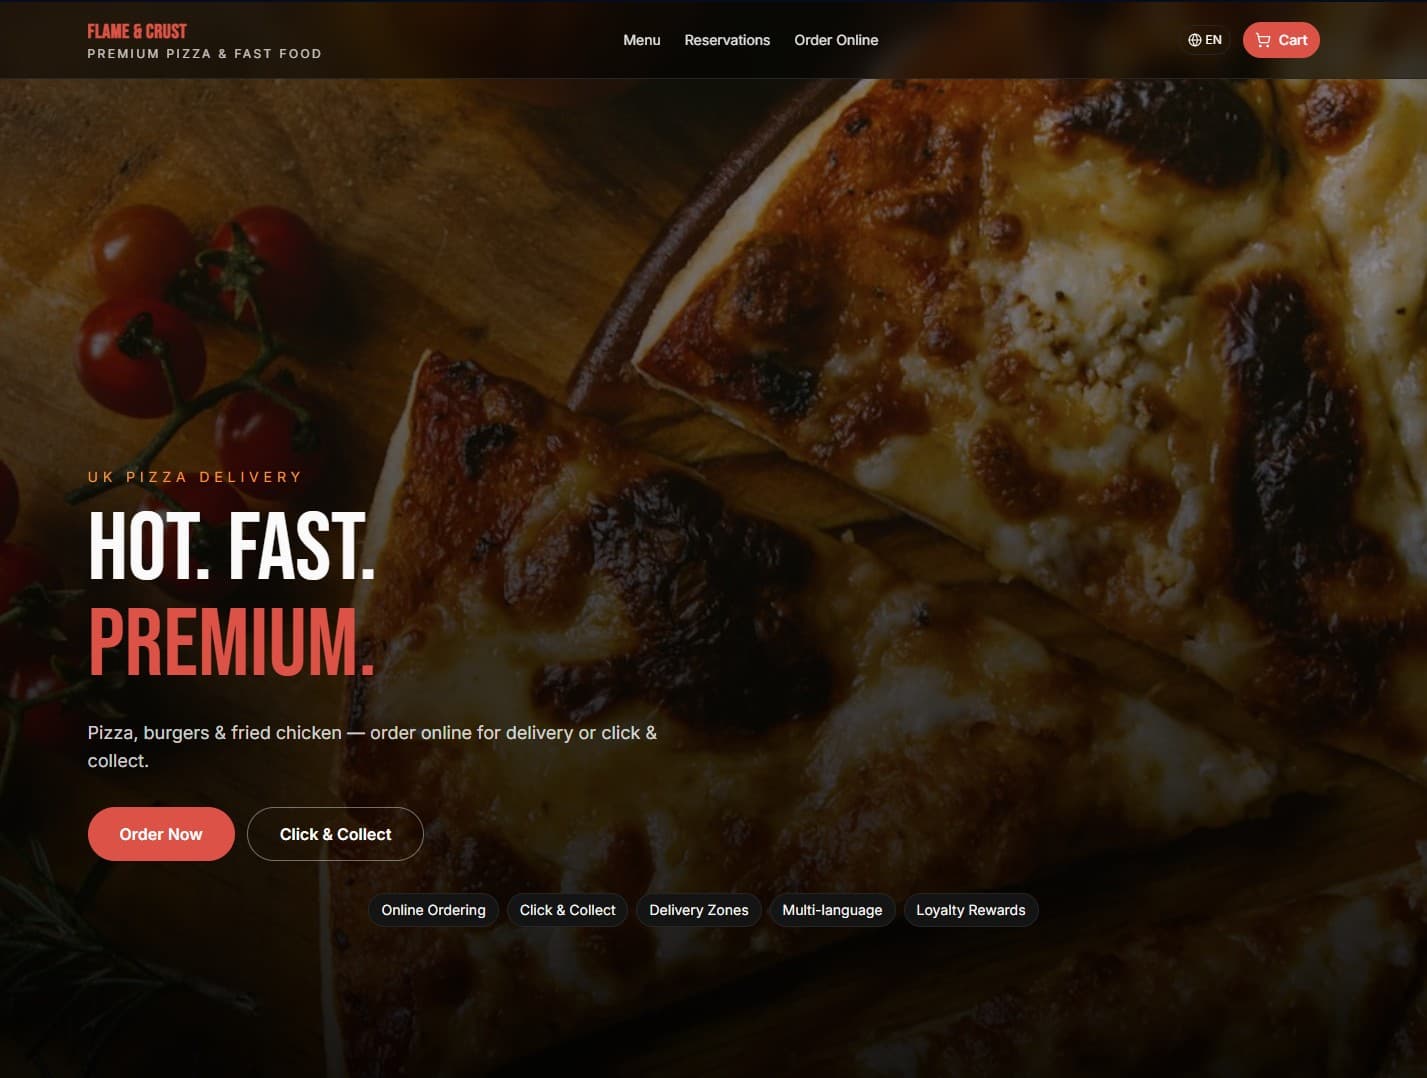
Flame & Crust
BrandMyFood Pizza restaurant website theme preview
  • Theme
  • Homepage copy
  • Featured products
  • Custom domain
  • Table QR menu
  1. Open Site Editor.
  2. Set the homepage and calls to action.
  3. Mark featured products in the menu.
  4. Save and open the restaurant site.
  5. Turn on online ordering if customers should order from the site.

Keep one clear action on the homepage. QR codes open the restaurant menu. They do not need a separate app. The public restaurant demo is demo.brandmyfood.co.uk. That is not Book a Demo.

Do I need a developer to change the homepage?

No. Core copy, offers and contact details are edited in Site Editor.

Can I use my own domain?

Yes, once DNS is pointed at the restaurant site.

08QR menu

A table QR opens the restaurant menu.

Generate a QR per table, print it, and place it on the table. The phone opens the restaurant menu. No app install is required for that menu.

  • One QR per table
  • Menu stays in sync with Menu Manager
  • Orders can return to the same operation
  1. Open the QR menu tools from the website setup.
  2. Generate the table codes.
  3. Print and place them.
  4. Scan one on a phone.
  5. Confirm the order reaches the kitchen.

The QR destination is the restaurant menu, not a marketplace listing.

Does the guest install an app?

No. The camera opens the menu page.

09Kiosk

A self-order screen, installed as its own station.

The kiosk package is the self-service ordering screen. It does not replace the till.

  • Dine-in or takeaway on the kiosk
  • Menu and modifiers
  • Payment only with what that station has configured
  1. Install the Kiosk package on that PC.
  2. Point it at the live menu.
  3. Place a test order.
  4. Confirm the ticket in Kitchen.
  5. Keep a person available if the guest needs the till instead.

Compatibility depends on the device and the installation. A card terminal on the kiosk is not automatic.

Is the kiosk the POS?

No. It is a separate station. The counter till remains POS and Tables.

10Customer display

The guest-facing screen for the sale in progress.

Customer Display is its own Windows package. It shows the sale facing the guest. It is not the staff phone and it is not a store listing.

  • Current order
  • Payment state
  • Installed on the customer-facing PC
  1. Install Customer Display on that PC.
  2. Pair it with the counter station.
  3. Place a test sale and check the guest screen.

Printers and the drawer stay on the PC that owns them.

Does this replace the till?

No. The guest looks at this screen. Staff still work on POS.

11Staff

Roles and the shift. The phone does not replace the till.

Add people, give them a role, and set the shift. Sample team: Alex R. Manager, Daniel K. Cashier, Sarah M. Waiter, Leo P. Chef.

  • Alex R.
  • Daniel K.
  • Sarah M.
  • Leo P.
Sarah M.

Saturday

Role · Waiter

For the floor. It does not replace the till.

  • Roles
  • Permissions for the stations they use
  • Shift times
  • Mobile staff, separate from the till
  1. Open Staff.
  2. Add the person and the role.
  3. Set what that role can open.
  4. Save the shift.
  5. Sign each station in with the matching role.

Emma R. is a guest, not a member of staff. Staff mobile is for the floor. It does not print the kitchen ticket by itself.

Can staff use a phone?

Yes, the staff app is a floor view. It does not replace POS, printers or the cash drawer.

12Analytics

Read the day from one dashboard.

The manager view shows net sales, orders, average order value, online sales, channels and top products. The figures on this site are illustrative interface data.

TodayEmber & OliveAll channels28 Sep 2026Illustrative interface data

£4,820Net sales+12.4% vs previous comparable period

  • 186Orders
  • £25.91Average order
  • £1,240Online sales
Sales today
10121416182022
Channels

Dine-in48%

Takeaway21%

Direct web18%

Delivery13%

Top sellers

Truffle pasta42

House burger31

Margherita28

Caesar salad19

  • Net sales and orders
  • Channel mix
  • Top products
  • Location comparison when you have more than one restaurant
  1. Open Analytics.
  2. Choose the day or range.
  3. Read sales, orders and channel mix.
  4. Use it to check the test day, not as a forecast.

Do not treat the sample £4,820 as your restaurant’s result. This view does not forecast labour or food cost.

Are the numbers on the marketing pages my sales?

No. They are illustrative interface data for Ember & Olive.

13Hardware

Printers, drawer, terminal and displays are set on the PC that uses them.

POS terminal, receipt and kitchen printers, cash drawer, card terminal, kiosk and customer display. Compatibility depends on the device and the installation. Hardware is not included in the subscription.

  • Windows or Ethernet receipt and kitchen printers
  • Cash drawer through the receipt printer
  • Card terminal where configured
  • One station package per PC
  1. On the PC with the printers, open Hardware → Print settings.
  2. Choose the receipt printer. For a kitchen ticket, set that printer or the Ethernet address and port.
  3. Test a receipt and a kitchen ticket.
  4. Configure the card terminal only if this station uses one.
  5. Download the other station installers for the other PCs.

An Ethernet printer address does not open the cash drawer by itself. Test after every port change.

Which terminals work everywhere?

None are universal. Use the terminal setup on that installation, including Teya POSLink where it is configured.

Can one PC print a receipt and a kitchen ticket?

Yes, when both printers are configured on that PC.

14Integrations

Connect a channel only after its setup is actually done.

Integrations connect ordering channels to the restaurant operation. They are not a separate product from online orders.

  • Deliveroo — setup required
  • Uber Eats — setup required
  • Just Eat — approval-dependent
  • WooCommerce — store credentials and polling
  1. Open Integrations from Product → Operations.
  2. Choose the provider the restaurant actually uses.
  3. Enter the credentials that provider issued.
  4. Confirm a test order in Online Orders and on the kitchen queue.

Keep provider credentials in the restaurant’s own account. A missing approval means the channel is not live yet.

Is Just Eat included automatically?

No. It stays approval-dependent.

Open integrations

15Go live

Check the stations. Nothing launches itself.

Use the first service as a checklist. The product does not mark the restaurant live for you.

  • Menu can be sold
  • Till can take an order
  • Kitchen can see it
  • A payment path is configured
  • A test website order completed
  1. Sell one product on the till.
  2. See that ticket in the kitchen.
  3. Take a test payment with a configured method.
  4. Place one order on the restaurant website.
  5. Only then open for service.

Book a demo if you want a person to walk the same path. That is separate from the public restaurant demo.

Is there a one-click go live?

No. Each station is confirmed by the restaurant.